If you saw my post about sourdough with walnuts and raisins, you know that I am "coping" with an oven that suddenly went haywire. While the problem has been diagnosed, we have to wait for a (very expensive) part. Five days and counting. This raises a few questions. To wit:
- Will I have to eat (gasp!!) store bough bread?
- Will a cake bake in the convection roast mode?
- Will I finally learn how to use my convection microwave?
- Can I bake bread in my toaster oven?
- Will I need medication?
Desperate times, people. Desperate times.
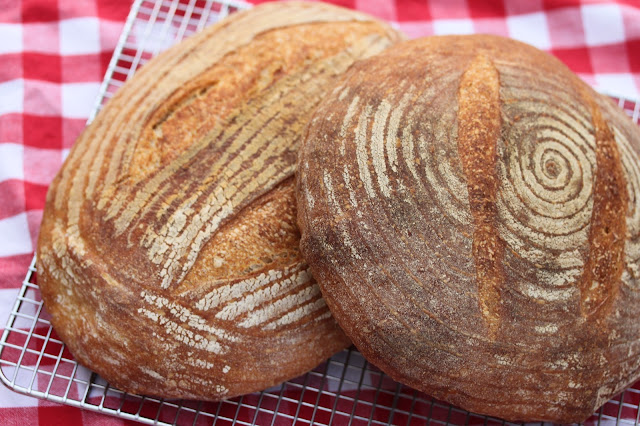
Thank goodness I have some baking adventure photographs saved up for times like these. Like this Norwich sourdough bread. It was given this name by Susan of Wild Yeast to honor the Vermont hometown of King Arthur Flour. Susan adapted this recipe from Bread: A Baker's Book of Techniques and Recipes by Jeffrey Hamelman. This bread is the perfect hearty everyday sourdough.
Norwich Sourdough
Yields two two-pound loaves, or several smaller loaves.
Ingredients
900 grams unbleached all purpose flour
120 grams dark rye or pumpernickel flour
600 grams of room temperature water
360 grams fed 100% hydration sourdough starter
23 grams salt
Instructions
- Add all of the ingredients except the salt to the bowl of a stand mixer and mix on low for about a minute.
- Let the dough rest for 30 minutes.
- Add the salt and mix with the dough hook for 3 to 4 minutes.
- Place the dough into a large oiled shallow bowl and allow to rise for 2 1/2 hours, doing two stretch-and-folds at 1/3 and 2/3 the way through (50 and 100 minutes), keeping the dough in the bowl.
- On a floured surface, gently divide the dough into two parts, and shape into balls. Allow the dough to rest, covered loosely in plastic wrap, for 15 minutes.
- Shape the dough into boules or batards, place them in floured bannetons or linen lined bowls, cover with plastic wrap, and allow the dough to rise for 2 to 2 1/2 hours.
- Preheat the oven with a baking stone on the second lowest rung and a broiler pan one rung lower to 475 degrees F.
- Turn the dough out onto a parchment lined cookie sheet or pizza peel and slash the dough.
- Drag the parchment onto the stone, add one cup of boiling water to the broiler pan, shut the oven door, and turn the temperature to 450 degrees F.
- Bake for approximately 40 to 50 minutes (use your instant read thermometer to test the dough), until it reaches an internal temperature of about 200 degrees F.
- Remove the loaves from the oven and cool them completely on a wire rack.
Sharing with Susan of Yeastspotting. Head over there to see amazing breads shared from around the world.


Those look sooo lovely... pretty loaves. Almost too pretty to eat ... ALMOST! :)
ReplyDeleteThank you TZ. I know we wasted no time consuming them =)
DeleteI love the markings that your proofing basket put onto the bread. What was the crumb like?
ReplyDeleteEeek!! Too bad about the oven! If you have a cast-iron pan, you can bake flatbread like naan on the stove top.
Hi Elizabeth! The crumb was like country bread. Not too dense, not really airy, but hearty. I should have taken a photo!
Delete