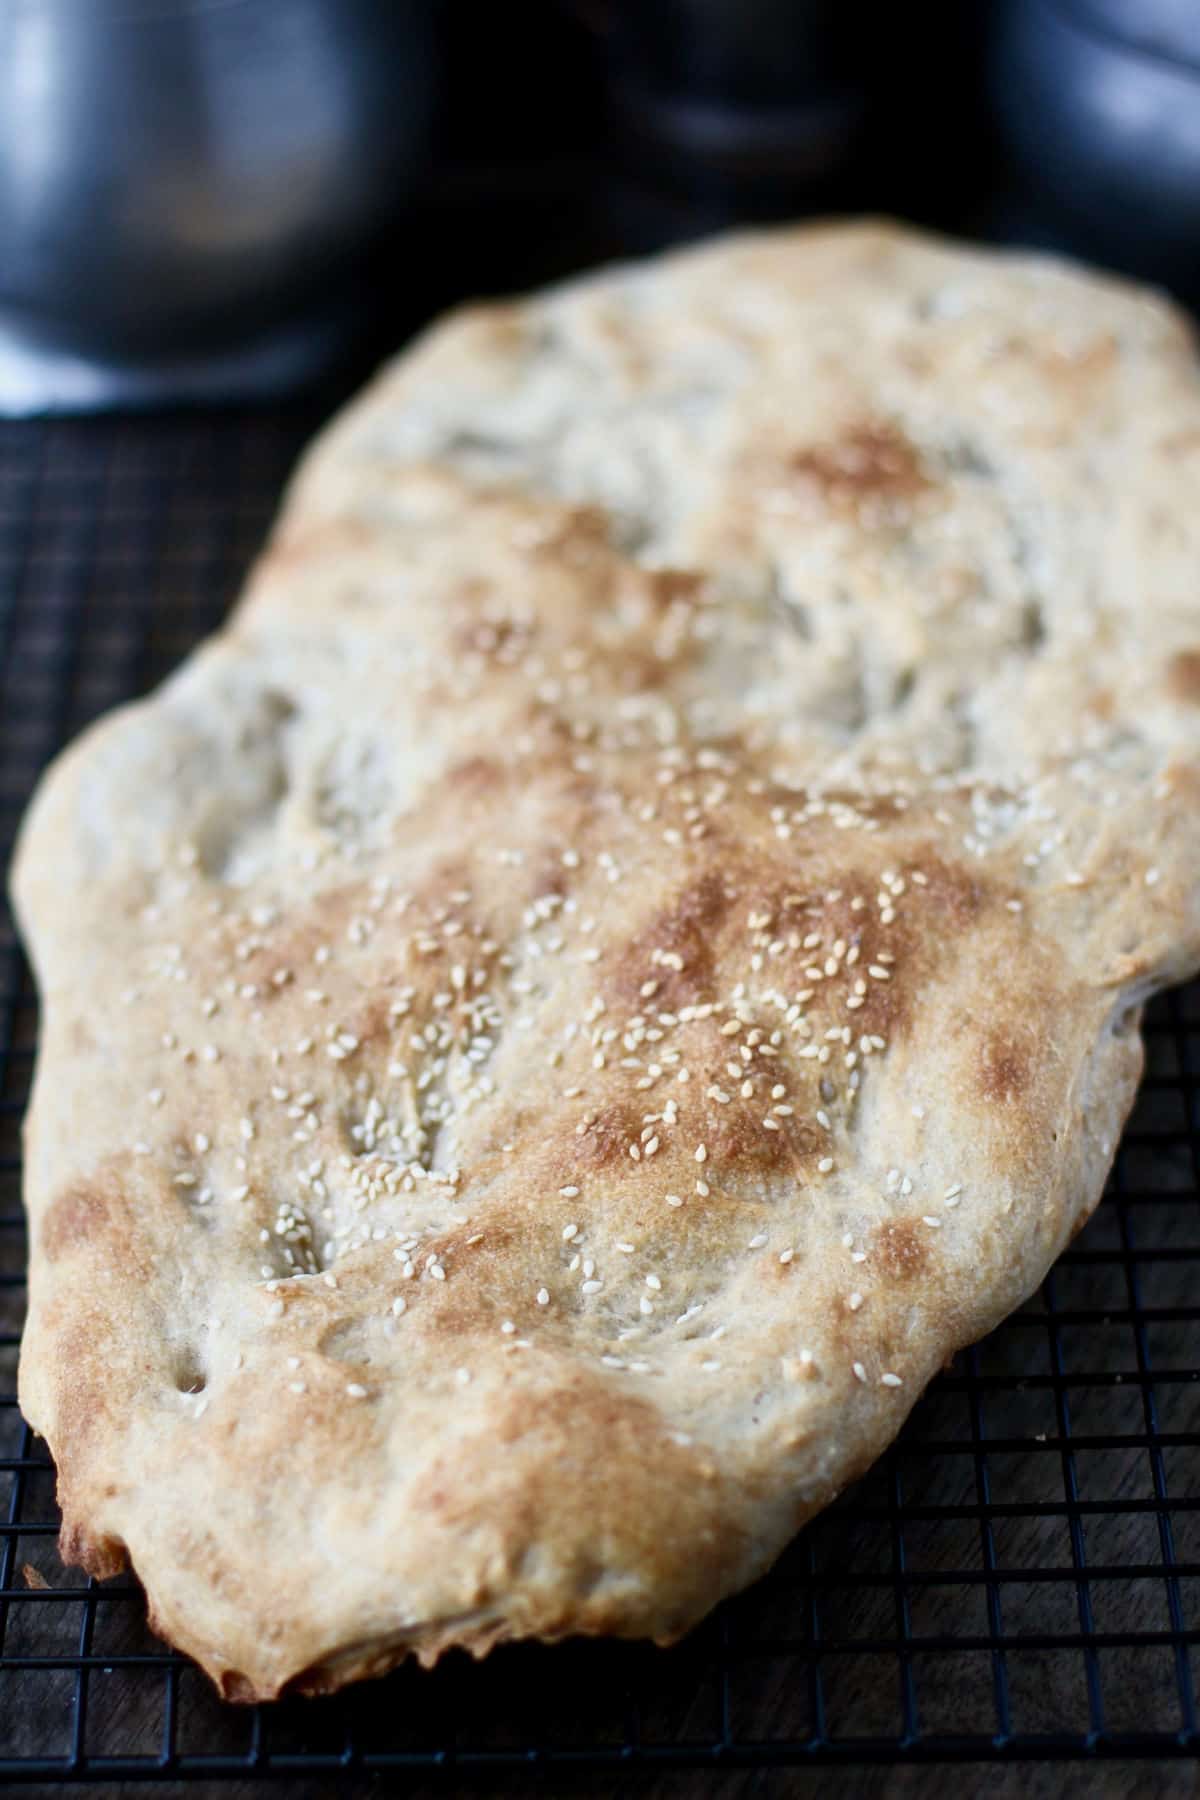
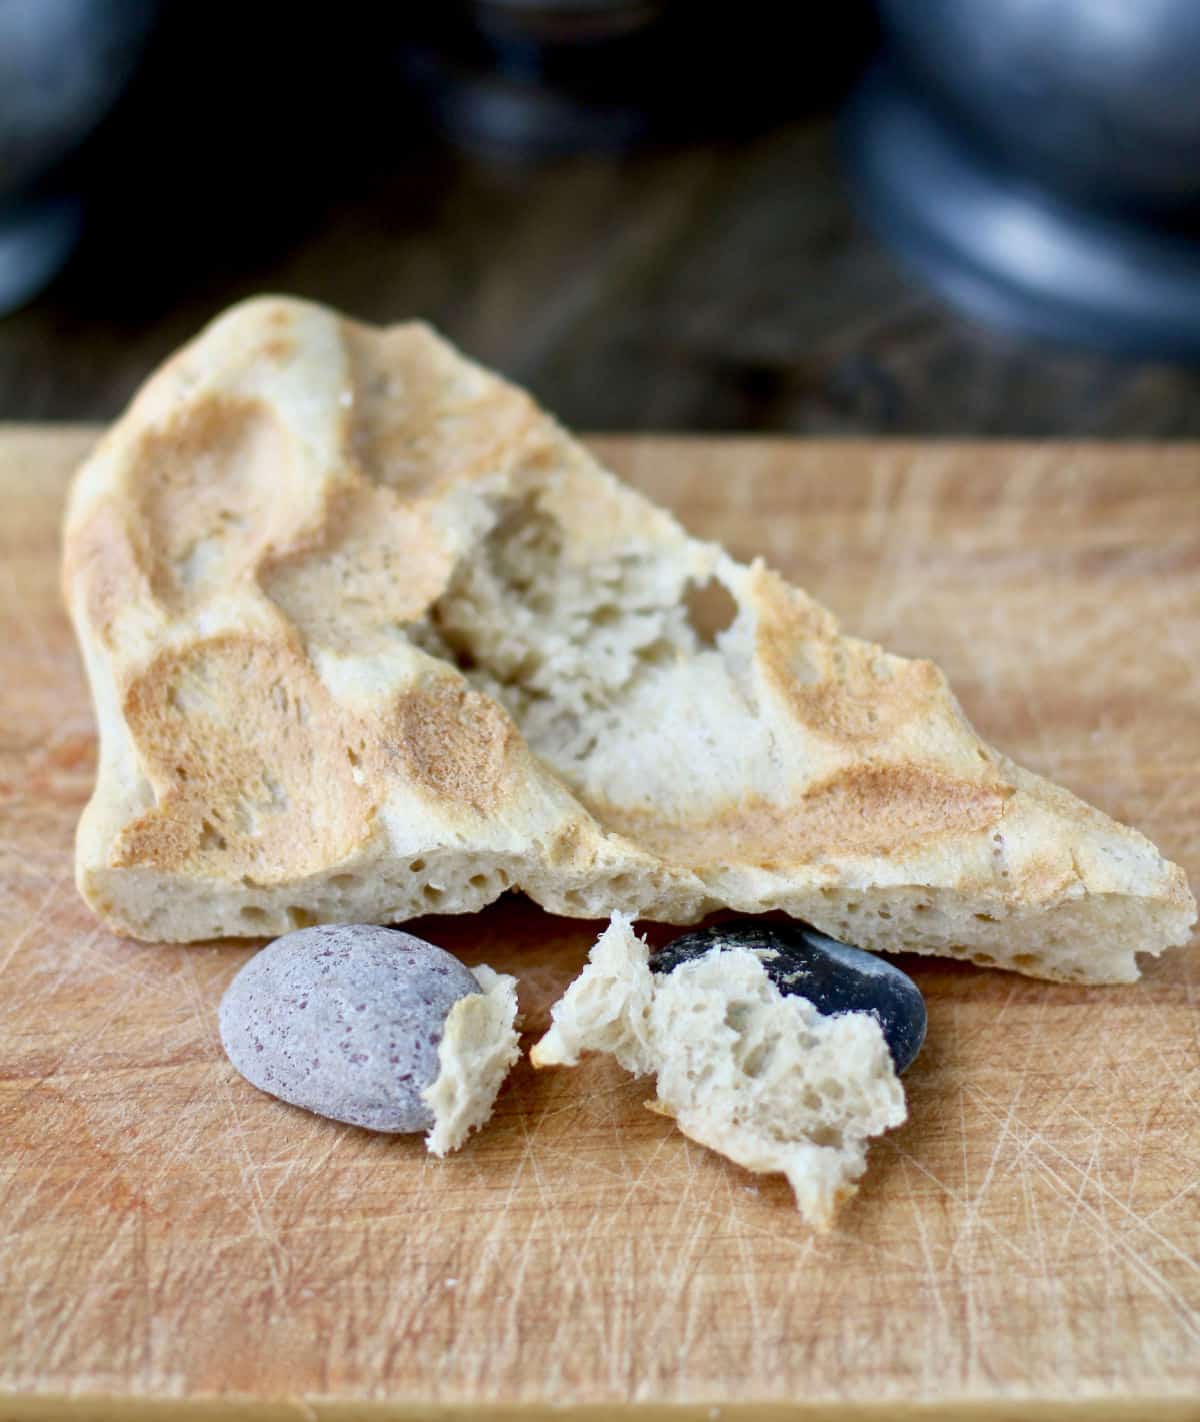
This Naan Sangak, made with a sourdough starter, was an amazing adventure to make. Plus, the resulting bread is crazy good.
Naan sangak is baked with an unusual and adventurous method. You actually bake the bread on a tray full of hot rocks! It's pretty fun.
The hardest part is cleaning the rocks you will use for baking the bread. The second hardest part is peeling the super hot rocks off of the baked bread without burning yourself.
The third hardest part is not scarfing down the entire loaf once it emerges from the oven. With butter nearby, I was in big trouble.
Equipment needed to make this naan.
First, you will need some rocks or pebbles. You can buy them for very little money at a garden center or hardware store. They will be very dirty, so you will need to wash them thoroughly. I soaked and scrubbed them several times.
I'm pretty sure there was a trace of dirt left, but I figured sitting in a 450 degree F oven would kill anything.
I would recommend smaller rocks. It seemed like the larger rocks stuck to the bread and were more difficult to pick off after the bread was done. By the way, use oven mitts when near the hot rocks.
You will also need metal tongs for removing any rocks that stick to the bread, as well as two half sheet pans, one pan for baking the bread, and one pan for shaping the dough and sliding it onto the rocks.
While I had several rocks that I needed to remove from the bread, I only had two rocks that actually ended up with dough stuck to them.
While this was a fun project, rest assured you can make this naan without the rocks (just use a baking stone), and it is totally delicious. I also think it would make excellent pizza crust.
How to make Naan Sangak:
The night before baking day, prepare your leavener by adding whole wheat flour and water to some of your starter and let it get all bubbly. It will rise and become active overnight.
In the morning, mix the final dough by hand, and then do 3 sets of "stretch and folds" every 20 minutes.
Next, let the dough rise until doubled. At this point, you can bake the bread, or deflate the dough by folding it and letting it rise again.
Load your rocks on one of the baking sheets and heat them in a 450 degree F oven or on an outdoor barbecue.
Wet the back of of the other baking sheet and spread the risen dough over it into a flatbread. Slide the dough onto the hot rocks, sprinkle it with some sesame seeds (optional), and bake it for 10 to 15 minutes. My naan puffed up quite a bit, so I probably could have spread it even thinner.
We totally enjoyed pieces of this bread still warm from baking. It's so good.
While this bread is best the day it is made, we've been enjoying it wrapped in foil and reheated in the oven, or split open and toasted for breakfast. The sourdough tang seems to become more pronounced on the second day.
I mixed this dough totally by hand in a 2 quart Cambro container so I could monitor the dough as it rose. The dough is pretty sticky. If the dough sticks to your hand, just wet your hand and plunge it back into the dough and the dough stuck to your hand will come right off and stick with the rest of the dough instead.
This month, the Bread Baking Babes are baking Naan Sangak, introduced to us by Elizabeth from Blog from OUR Kitchen. I'm really glad she did! I loved the dough and the resulting bread, and it was a lot of fun playing with rocks!
We did have to buy way more rocks than we needed (at least 20 pounds!), but they were very inexpensive, and we can probably use the overflow in our garden. They were so dirty that they all looked like they were the same color. After washing, they were a different array of colors.
Most of the other babes also boiled their rocks after washing them, or put them through a spin in the dishwasher. I just soaked and scrubbed mine several times until they were good enough.
Check out the rest of the Babes' versions of this bread:
Naan Sangak (Persian Pebble Bread)

Ingredients
- 40 grams 100 percent hydration sourdough starter
- 50 grams room temperature water
- 50 grams whole wheat flour
- 320 grams (2 1/2 cups plus 2 tablespoons) all purpose flour
- 180 grams (3/4 cup plu 1/2 teaspoon) room temperature water
- 25 grams plain, full fat yogurt
- 15 grams (1 tablespoon) olive oil
- All of the leavener
- 8 grams (1 1/3 teaspoons) salt
- Sesame seeds for topping, optional
Instructions
- The night before baking day, mix the leavener ingredients in a smallish bowl, cover with cling wrap, and let ferment overnight.
- To mix the final dough, add all of the ingredients except the salt to a bowl large enough for the dough to triple in size. Mix with your hand, wetting your hand as you go, until everthing is combined and you have a rough dough.
- Cover with a lid or cling wrap and let sit for 20 minutes.
- Add the salt and with a very wet hand, pinch the salt into the dough and then fold it over itself several times. Repeat pinching and folding until you have a smooth dough and you don't feel any salt grains.
- Cover and let sit for 20 minutes.
- Stretch and fold the dough over itself from all sides of the bowl and then cover and let sit for 20 more minutes. Repeat the stretching and folding 3 more times.
- Let the dough rise until doubled, two to four hours.
- Place the rocks on a half sheet pan and place it on the middle rack of your oven. Heat the oven to 450 degrees F.
- Spray the back of a sheet pan with spray oil, and then spray it with water. Quickly stretch the dough over the back of the pan.
- Carefully slide the dough over the top of the rocks in the oven (you can also remove the pan from the oven to make it easier to transfer the dough) and close the door. Bake for 10 to 15 minutes, untl the bread is lightly golden. Using tongs, remove the bread from the baking sheet. If rocks have stuck to the bread, place it, bottom side up, and use metal tongs to remove the stuck on rocks. Be very careful!
- Serve warm.


Oh wow, you got gorgeous color and crumb with yours!
ReplyDeleteThank you! I was hoping for a bit more color, but was thrilled with the crumb!
DeleteYour crumb looks beautiful! Lovely photos as well. This was definitely an adventure, but a fun one!
ReplyDeleteThanks Cathy.
DeleteJust one warning. Once my husband changed the rocks in the bottom of our small BBQ - put on the briquets and fired it up. Started the steaks on the grill - heard a pop and thought nothing of it. When I went to eat the meat it was peppered with rock shards on the bottom. So maybe heat those rocks once before using them.
ReplyDeleteI heard that from one other person. That's a great idea.
DeleteYou had a lot of hard parts to this bread (not to mention the hard stones) 😉
ReplyDeleteYou got wonderful bread and a great adventure. We are also in total agreement, bread baking is an adventure…a big part of why I love it.
Thank you!! I feel the same.
DeleteIndeed one of the perfect work, I have ever came across!!
ReplyDeleteYour bread looks wonderful, Karen. And now that you've gone through the long process of cleaning the rocks, you will only be left with two hard tasks with this bread: removing those pesky hot stones and to try not to eat it all right away. We've found that if we let the bread cool a little, the stones are a little easier to remove. A little....
ReplyDeleteOooh, great idea to use this as pizza crust! Although... I might be foolish enough to dress the pizza, bake it on the rocks and then not have ANY idea how to get the stuck rocks from the bottom of the pizza without losing all those toppings.
Ha ha! Yes, that would be a challenge!!
DeleteYour bread is gorgeous - it looks so light and 'fluffy' ! And great color....
ReplyDeleteThanks Katie!
Delete