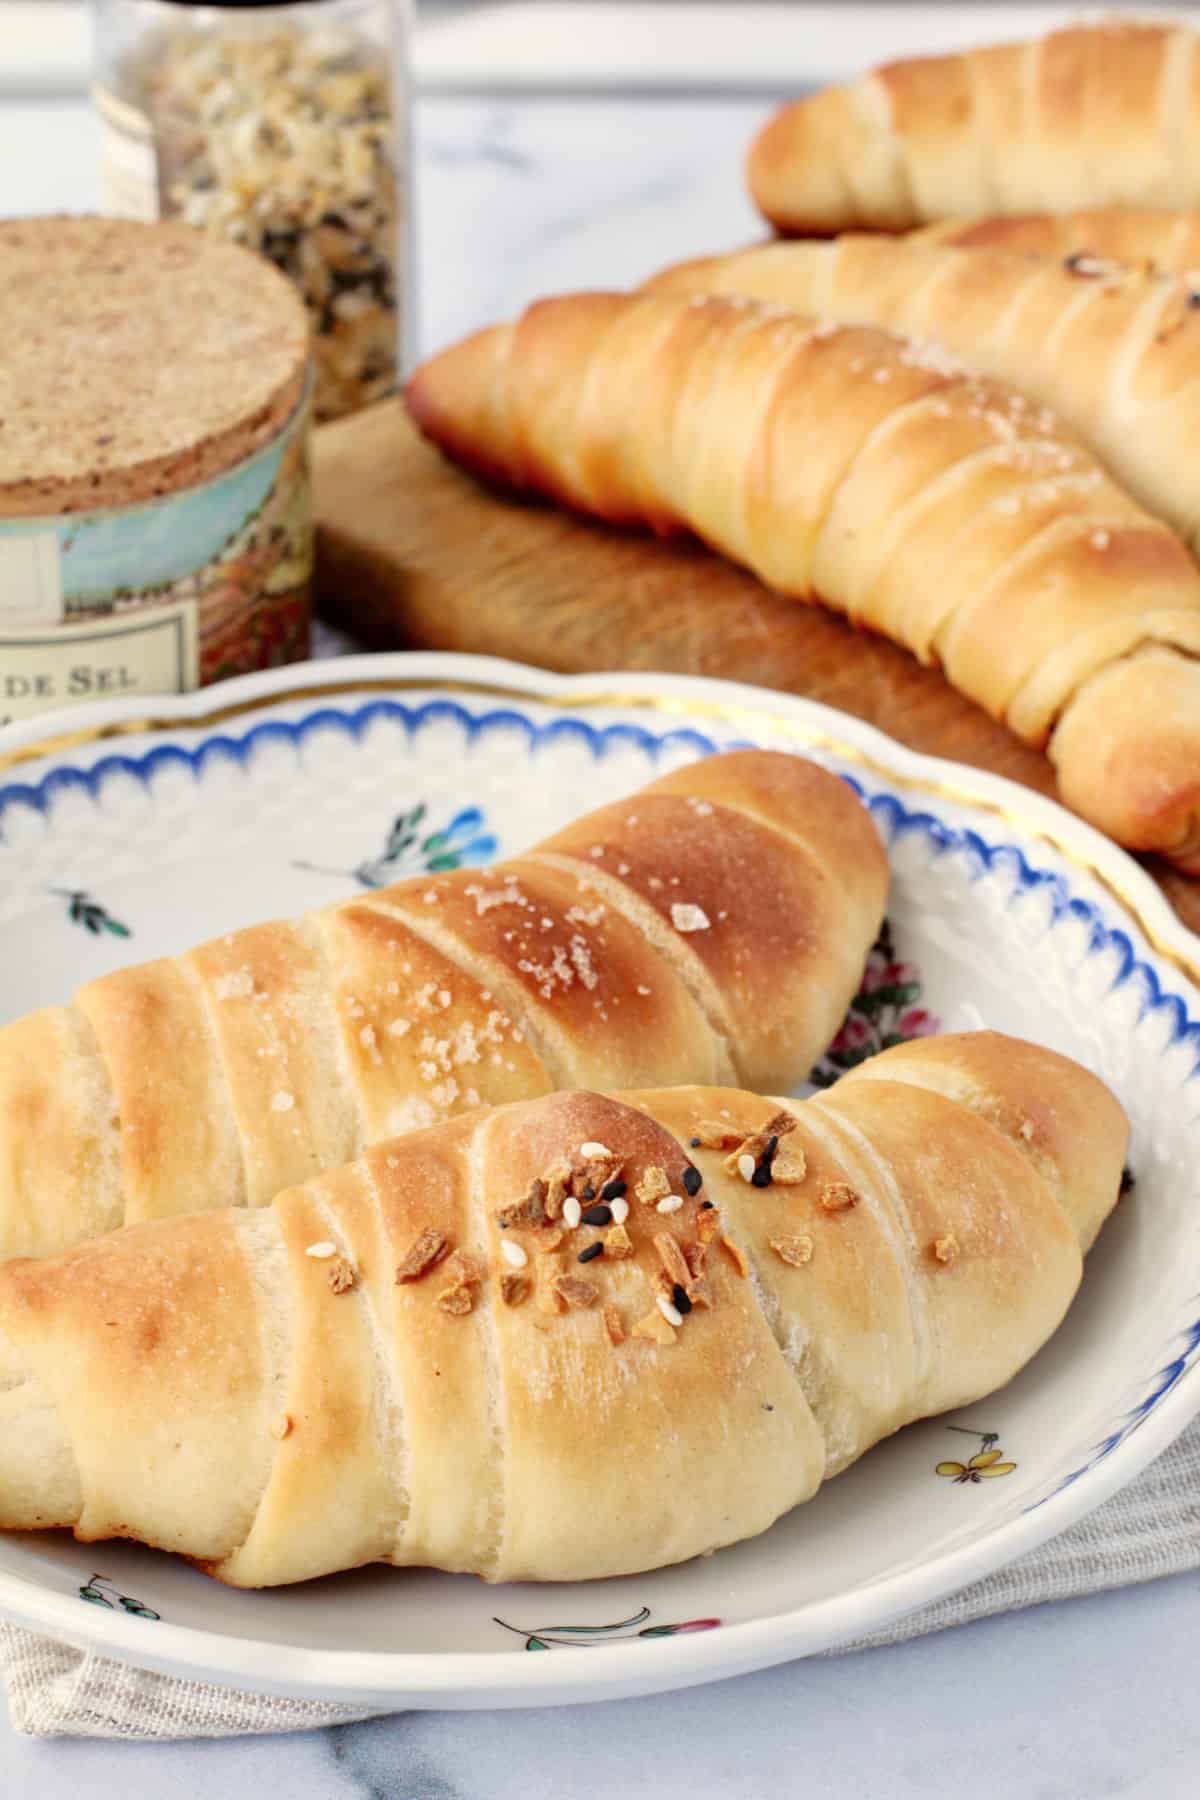
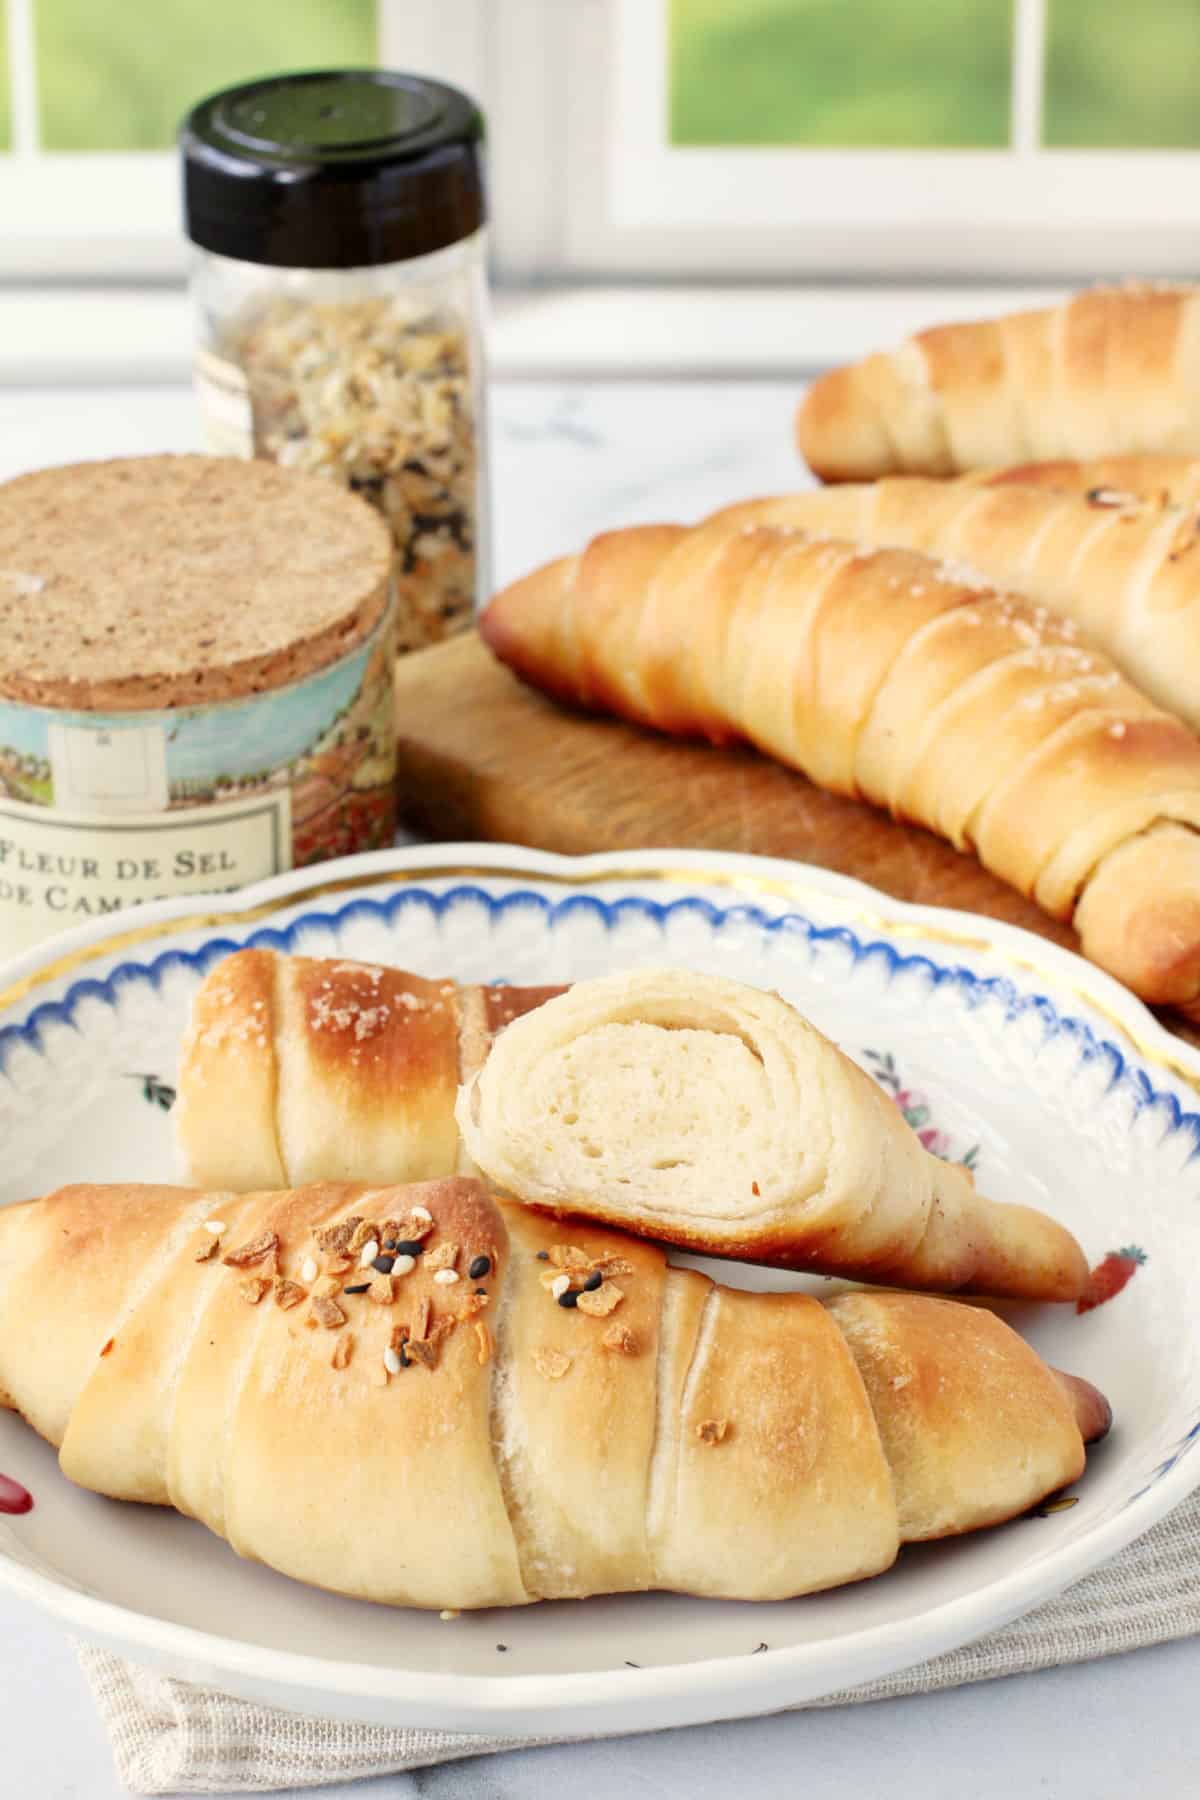
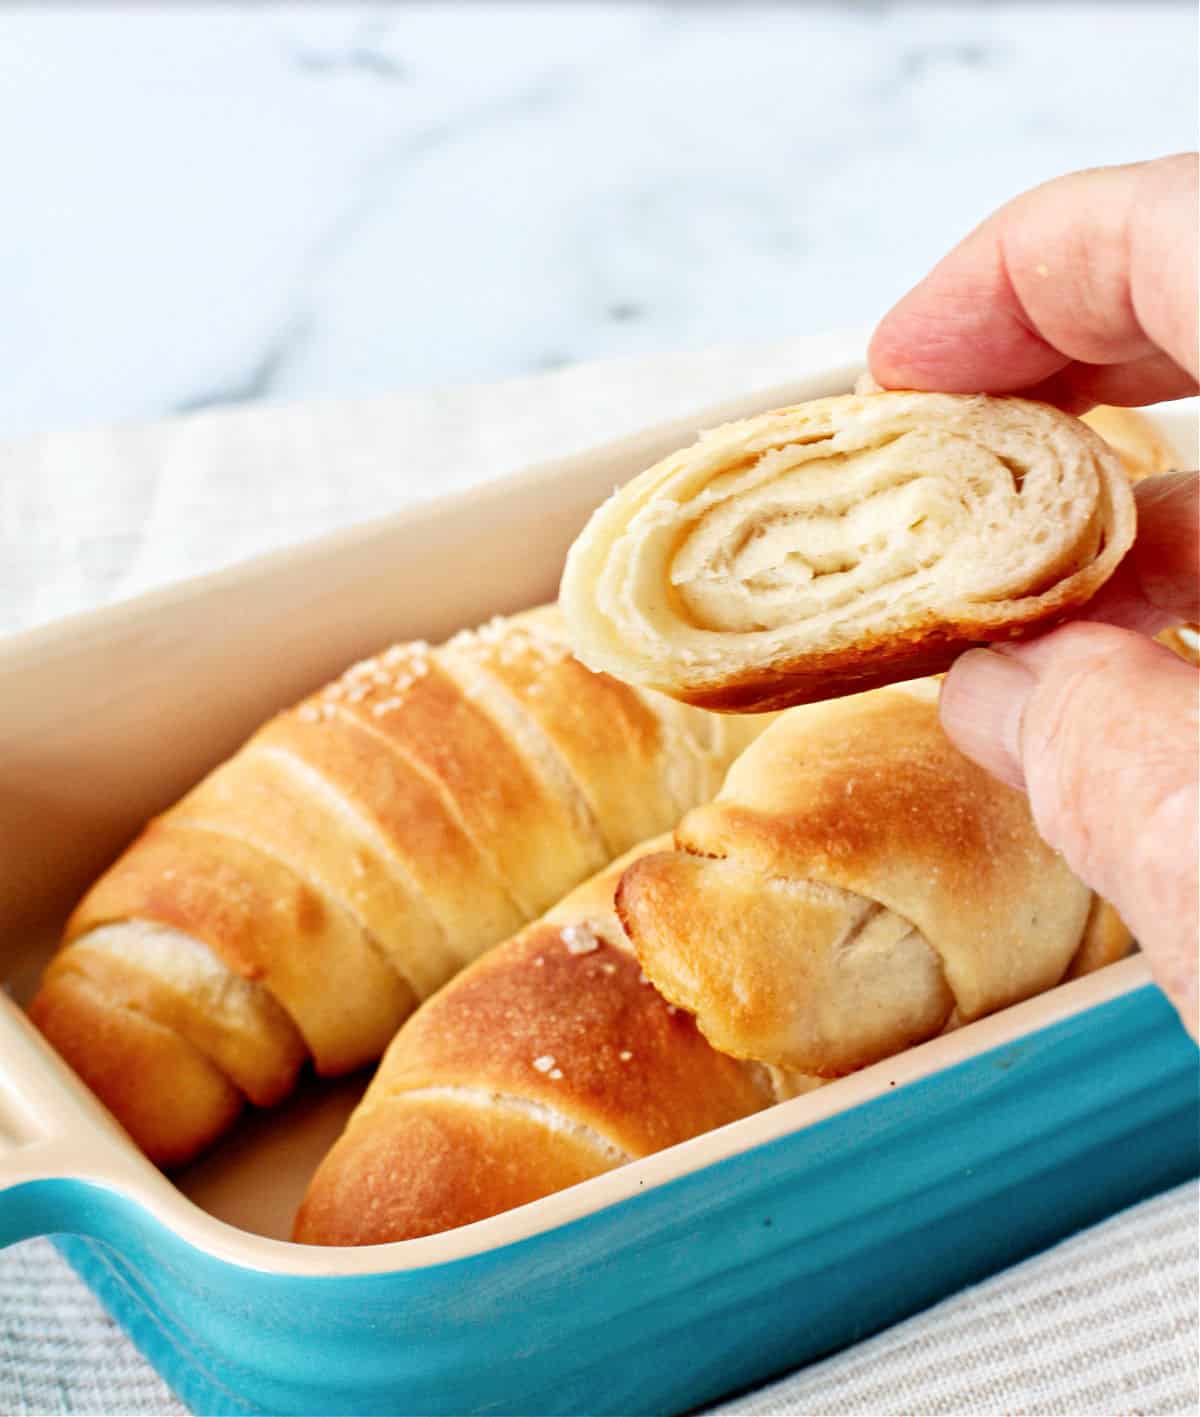
This Shio Pan, 塩パン, or Japanese salt bread, is a super soft, faintly sweet, and totally buttery crescent-style roll. These rolls are super flaky and light as air.
These shio pan rolls are amazingly light, flaky, and most importantly, buttery.
When shaping these rolls, you stuff a long piece of butter right in the middle. It melts onto the baking sheet and kind of "fries" and crisps the bottom of the roll. Plus, the butter that has melted onto the baking sheet becomes lightly browned, adding even more flavor.
These are divine!
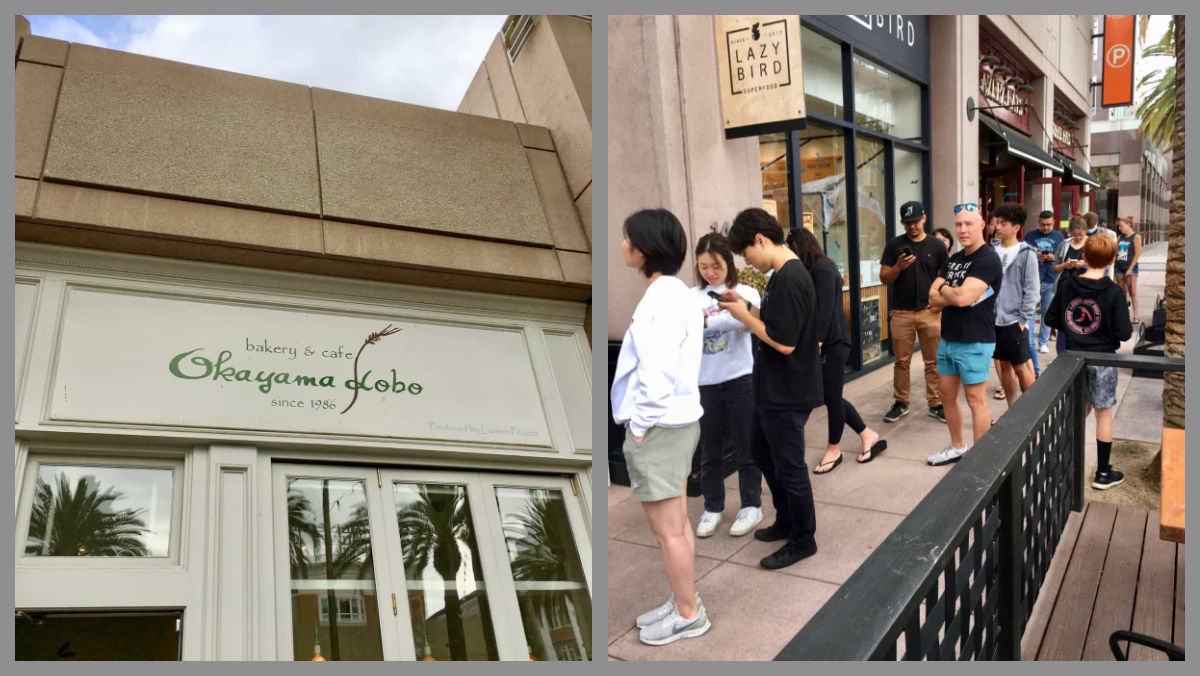
I first discovered this bread when visiting a Japanese bakery in Anaheim in a meetup with a favorite food blogger, Tara of Tara's Multicultural Table. We were online buddies for years, so when Tara moved temporarily to southern California, we made sure to get together for several lunches and ingredient shopping expeditions.
She discovered so many amazing food places in my back yard, including this place, Okayama Kobo Bakery & Café in Anaheim, within two miles of Disneyland. Doesn't it always take a visitor to make you see your own hometown in a new light?
At the bakery, there is a good amount of outdoor seating in front of the sidewalk for enjoying your treats too. Luckily, we were early enough in the morning that we didn't have to wait in that line!
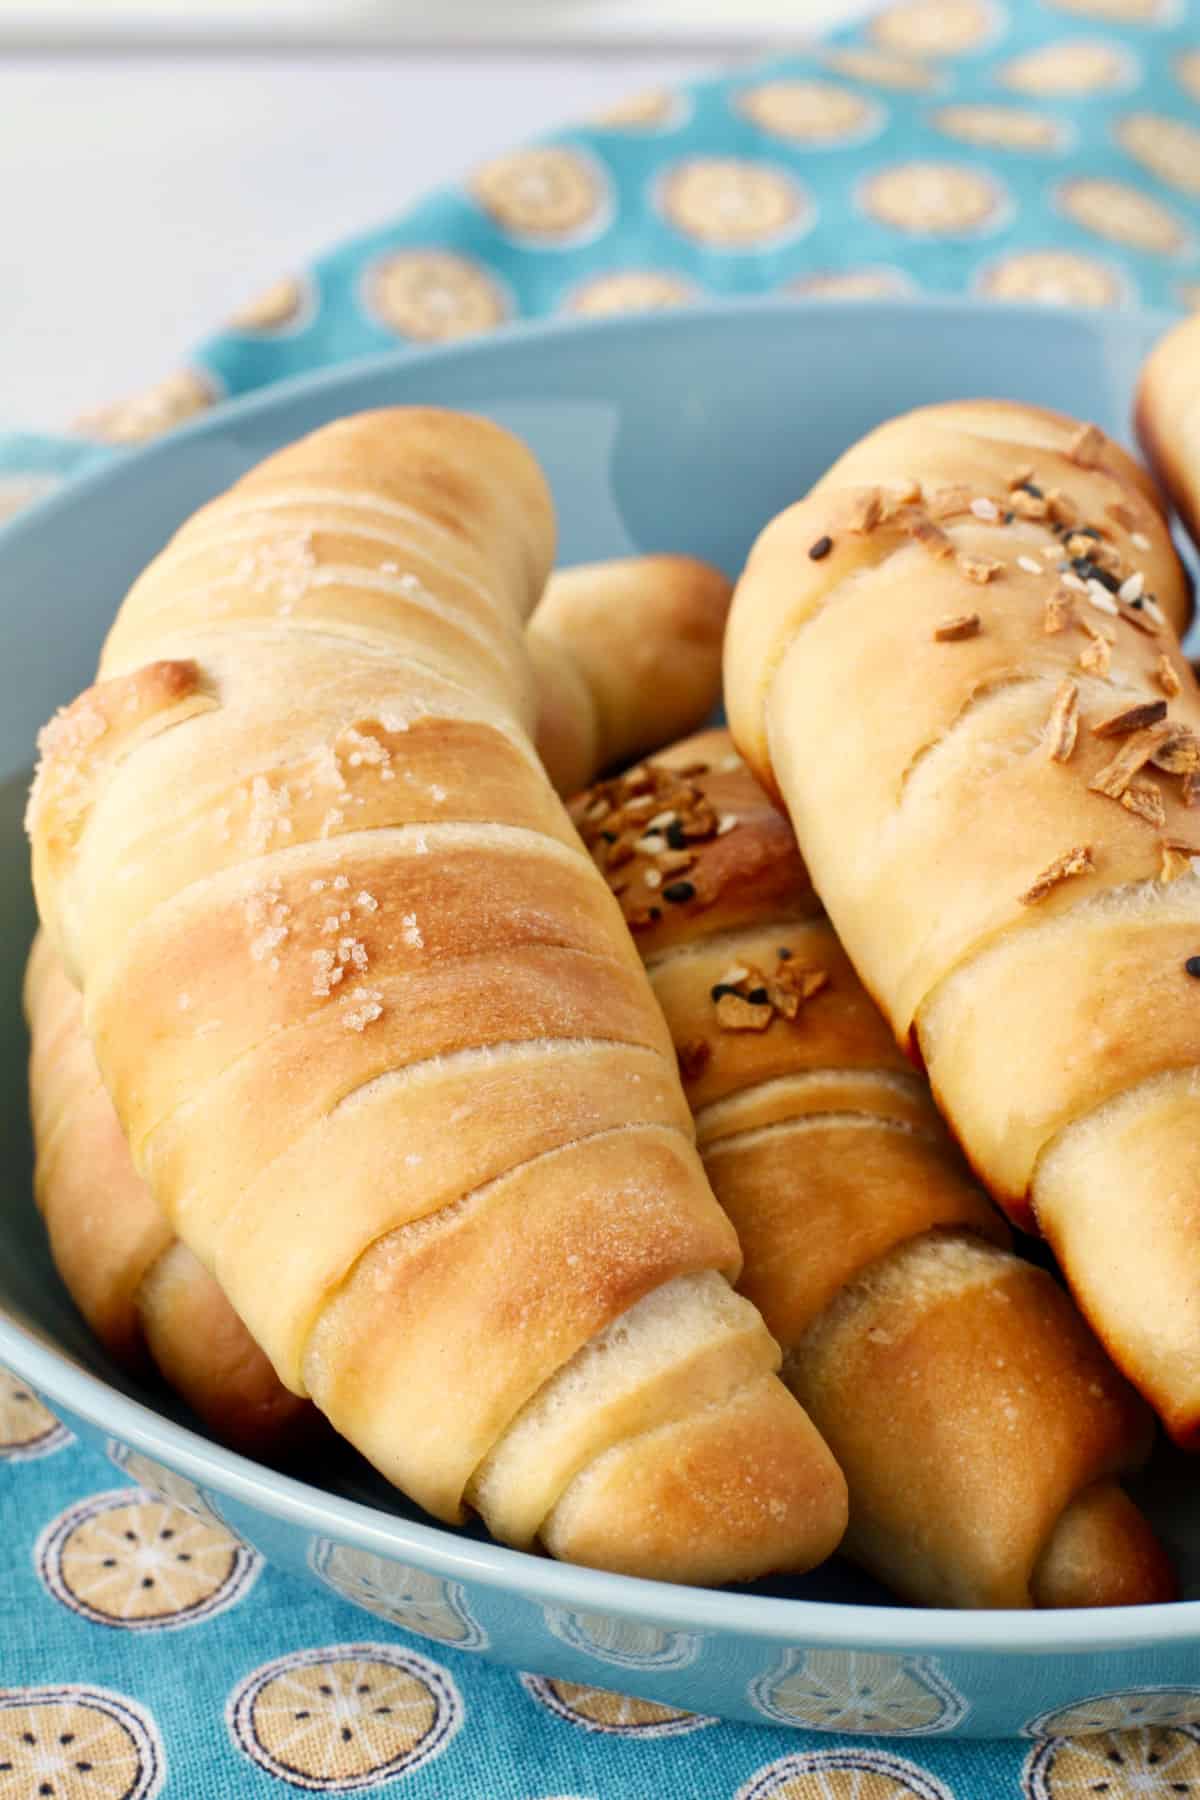
I ordered an Everything Shio Pan, or Salt Bread, which came with a side of whipped cream cheese, and loved it. Shio pan is traditionally topped with flaked sea salt, but the bakery also had an Everything version (the one I had), a pesto and sundried tomato version, one filled with red bean paste, and one topped with a "cookie" topping, similar to pineapple rolls.
My mission has been to try to recreate these.
I made three traditional rolls with flaked sea salt, and three rolls topped with Everything topping in an homage to my visit to the bakery. They were so good!
Ingredients Shopping List:
From your pantry: bread flour, granulated sugar, fine sea salt, water, and instant yeast.
You can use table salt instead of sea salt, but use a little bit less.
From your fridge: milk and butter. You'll need unsalted butter for the dough, plus more butter for brushing between the layers of dough and long pieces of butter for rolling up into the dough. I used unsalted European butter for the long pieces and salted butter for brushing. You can play around with salted and unsalted or a combination.
If you want to really play around, maybe try adding different ingredients to make different compound butters for the butter strips and re-chilling them.
For the topping: flaked sea salt or Everything Bagel topping.
This bread does not use a tangzhong, yet the results are so soft and light!
I'm super thrilled with these rolls. They take about half a day, most of it down time waiting for the dough to rise, to make amazingly light and flaky rolls. I wanted to eat about three in one sitting.
Procedure:
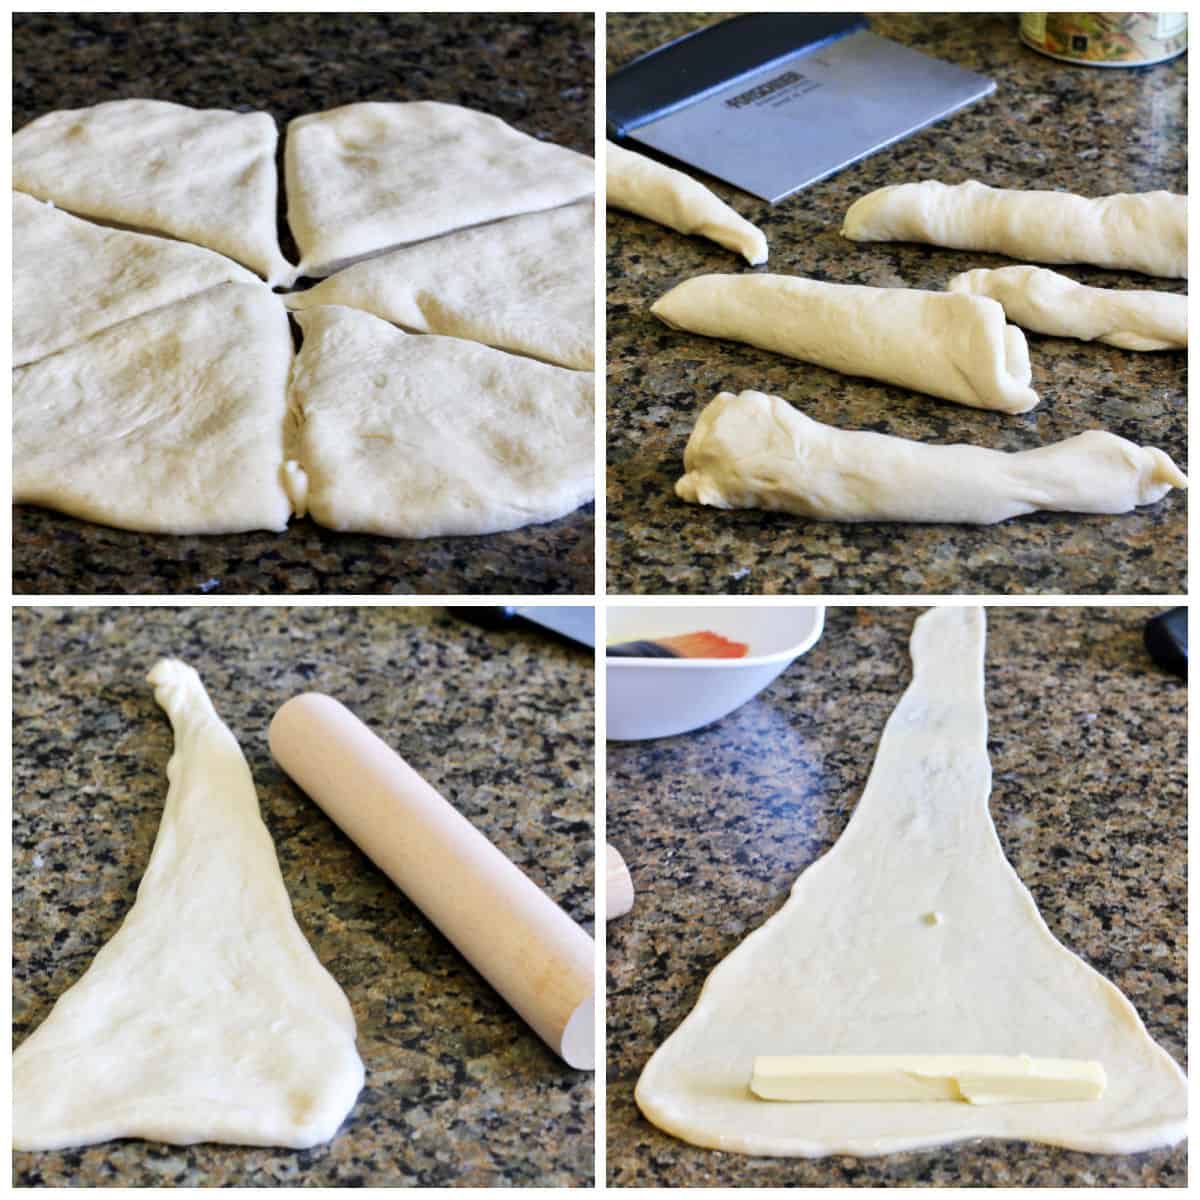
The trick to making these rolls, besides all of the butter, is the shaping method. It involves stretching the dough into a long thin triangle that you roll up into a crescent.
First, make the dough by kneading in a stand mixer, bread machine, or by hand. I used a stand mixer. Let the dough rise until doubled.
Next, divide the dough into six pieces and form them into cones. Let them rest, covered for about ten minutes so that the dough can relax. Roll the dough out into a long and thin triangle and brush the rolled out dough with more melted butter.
After that, place a long strip of butter at the wide end and roll up the dough from the wide end to the small pointy end. Let the rolls rise until puffy.
Finally, mist the rolls with water and sprinkle them with flaked sea salt or Everything Bagel topping and bake.
Even with my squiggly long triangle, the shaped rolls looked pretty symetrical.
I used a tiny rolling pin that "I had" to buy to make Chinese potstickers. A French rolling pin would work just fine.
While not required, I recommend using French or European butter if you can find it for the butter piece that you'll be rolling up in the middle.
These are best warm from the oven or within two hours. You can rewarm leftovers the same day to refresh them. Individually wrap and freeze additional leftover rolls for reheating in the oven over the next few days.
Serve these with cream cheese, butter (yes, more butter!), or jam. You could also make them into little ham and cheese sandwiches.
Definitely feel free to play around with the toppings.
I went crazy over this bread!
More Asian-Style Bread Recipes You May Also Enjoy:
Japanese Milk Bread with Furikake
Steamed Chicken and Vegetable Buns
This month, the Bread Baking Babes are joining me to make Japanese Salt Bread, or Shio Pan. After the recipe, be sure to check out everyone's creative take on this recipe.
Shio Pan - Japanese Salt Bread - 塩パン

Ingredients
- 210 grams (1 3/4 cups) bread flour
- 10 grams (2 1/2 teaspoons) granulated sugar
- 3/4 teaspoon fine sea salt
- 1/2 teaspoon instant yeast
- 70 grams (scant 1/3 cup) cold milk
- 70 grams (scant 1/3 cup) cold water
- 7 grams (1 1/2 teaspoons) softened unsalted butter
- 15 grams (1 tablespoon) salted butter, melted, for brushing
- 60 grams (generous 1/4 cup/half a stick plus) unsalted butter (preferably European-style), cut into six 10 gram strips as pictured.
- Water for misting
- Flaked sea salt or Everything Bagel Mixture for topping
Instructions
- Whisk together the flour, sugar, salt, and yeast in a medium bowl.
- Dump in the milk and water and mix by hand or dough whisk until just combined. Add the softened butter and knead it in by hand.
- Knead the dough by hand (using pressing, stretching, and folding constantly) or mixer for about five minutes, until smooth. The dough will be fairly sticky but don't add more flour unless your kitchen is super humid.
- Let the dough rise until doubled, 45 minutes to 2 hours, depending on your room temp.
- Turn the dough out onto your unfloured work surface and form it into an 1/2 inch thick round disk.
- Cut the dough into 6 wedges with a bench scraper.
- Roll each piece of dough into a cone, pinching the seam, and let rest, covered, for 10 minutes.
- With your hands, press each into a triangle and then, using a rolling pin, shape each into a very long, thin triangle. Lightly brush each triangle with melted butter. Place a 10 gram butter stick on the wide end and roll up the dough and form it into a crescent. Place it on a parchment lined baking sheet.
- Repeat with the rest of the dough. Cover loosely with oiled plastic wrap and let rise until puffy, about 45 minutes to an hour in a warm spot.
- Heat your oven to 400 degrees F.
- When ready to bake, spray the shaped rolls with water until they are shiny. Sprinkle each with a pinch or so of flaked sea salt.
- Bake for 15 to 18 minutes, until lightly golden on top and crispy and browned on the bottom.
- Transfer to a wire rack. Serve warm.
Nutrition Facts
Calories
241Fat (grams)
12 gSat. Fat (grams)
7 gCarbs (grams)
28 gFiber (grams)
1 gNet carbs
27 gSugar (grams)
2 gProtein (grams)
5 gCholesterol (grams)
31 mgAfter much experimentation, I adapted this recipe mostly from Vanillyn Bakery, but with adaptations from Food 52 and, of course, Tara's Multicultural Table (be sure to follow Tara on Instagram. She is always posting food photos from all of the wonderful places she visits along with her own recipe creations). Also, one of my favorite bread bakers Aldrina Yun has a post on Facebook with a link to her great shaping video for these rolls.







They are beautiful and the golden bottoms look delicious. How fun that you got to meet up with Tara. It's exciting when online friends become real friends too.
ReplyDeleteSo exciting! I love meeting my virtual friends IRL! Thank you!
DeleteSuch a delicious version of crescent rolls! Thanks for choosing this recipe.
ReplyDeleteThank you for baking with me!
DeleteThese are beautiful buttery delights! Thank you for introducing us to this bread.
ReplyDeleteI can't wait to try your version!
DeleteAwww so glad you made these! I am missing Okayama Kobo so much right now. Yours look absolutely fantastic and I love that you included the everything bagel topping!
ReplyDeleteThanks Tara! You are my inspiration!
DeleteYou got so many layers! I rolled my first one and decided I needed to REALLY stretch the triangle so I could get more wraps in!
ReplyDeleteThanks Kelly! You can't have too many layers, lol.
DeleteSo.... Everything is, apparently, a 'thing'? I first thought it was being used like 'loaded'. lol. Regardless of the finish, the rolls look and sound delicious!
ReplyDeleteIt is a "thing!" Just visit any bagel shop. Thanks Katie =)
DeleteYour mission: accomplished!! And how.
ReplyDeleteWe. Loved. These. Rolls. (Note the past tense. I need to make more.)
Makes me very happy!
DeleteOf course, your Shio Pan are gorgeous! Thanks a bunch for choosing this for us to bake. We're totally in love with them!! :D
ReplyDelete